Monday, December 19, 2011
F*ck me
Searching for a solution to a mystery problem I seem to be having at the moment. Updates to come soon.
Monday, November 14, 2011


Monday, October 31, 2011
Sandy gets the chop
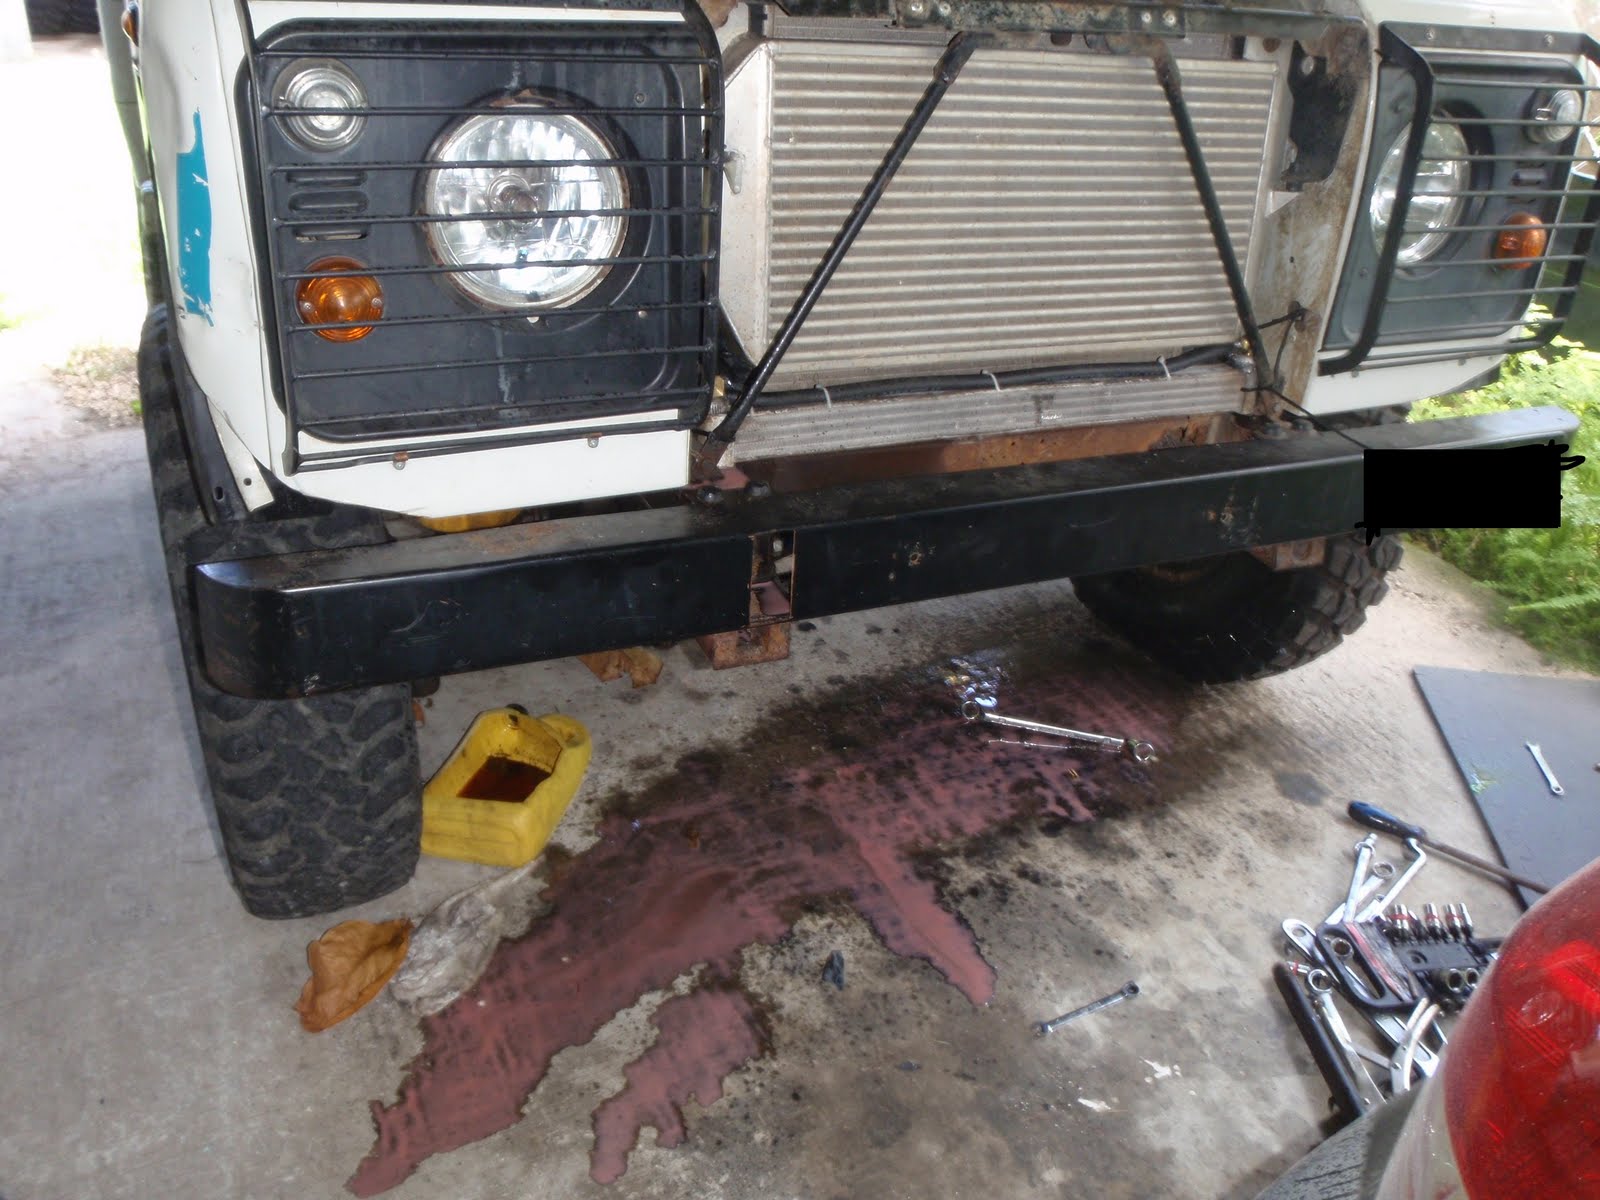
In a random fit of idleness I've decided to bob-tail the defender. I'm actually half way through, and have the tailstock cut off with me trusty angle grinder.
It took a little more thought and planning than just chop/weld bam!. For starters I've had to decide what to do with my fuel tank, and I've temporarily relocated it to behind the cab. There's also the need to relocate the wiring harness that used to run in the chassis, but a hole saw should solve that issue.
I've also actually thrown together an MSpaint jpeg of how it should look.

Before

After
Monday, July 18, 2011
Ram-assist test - Take 1

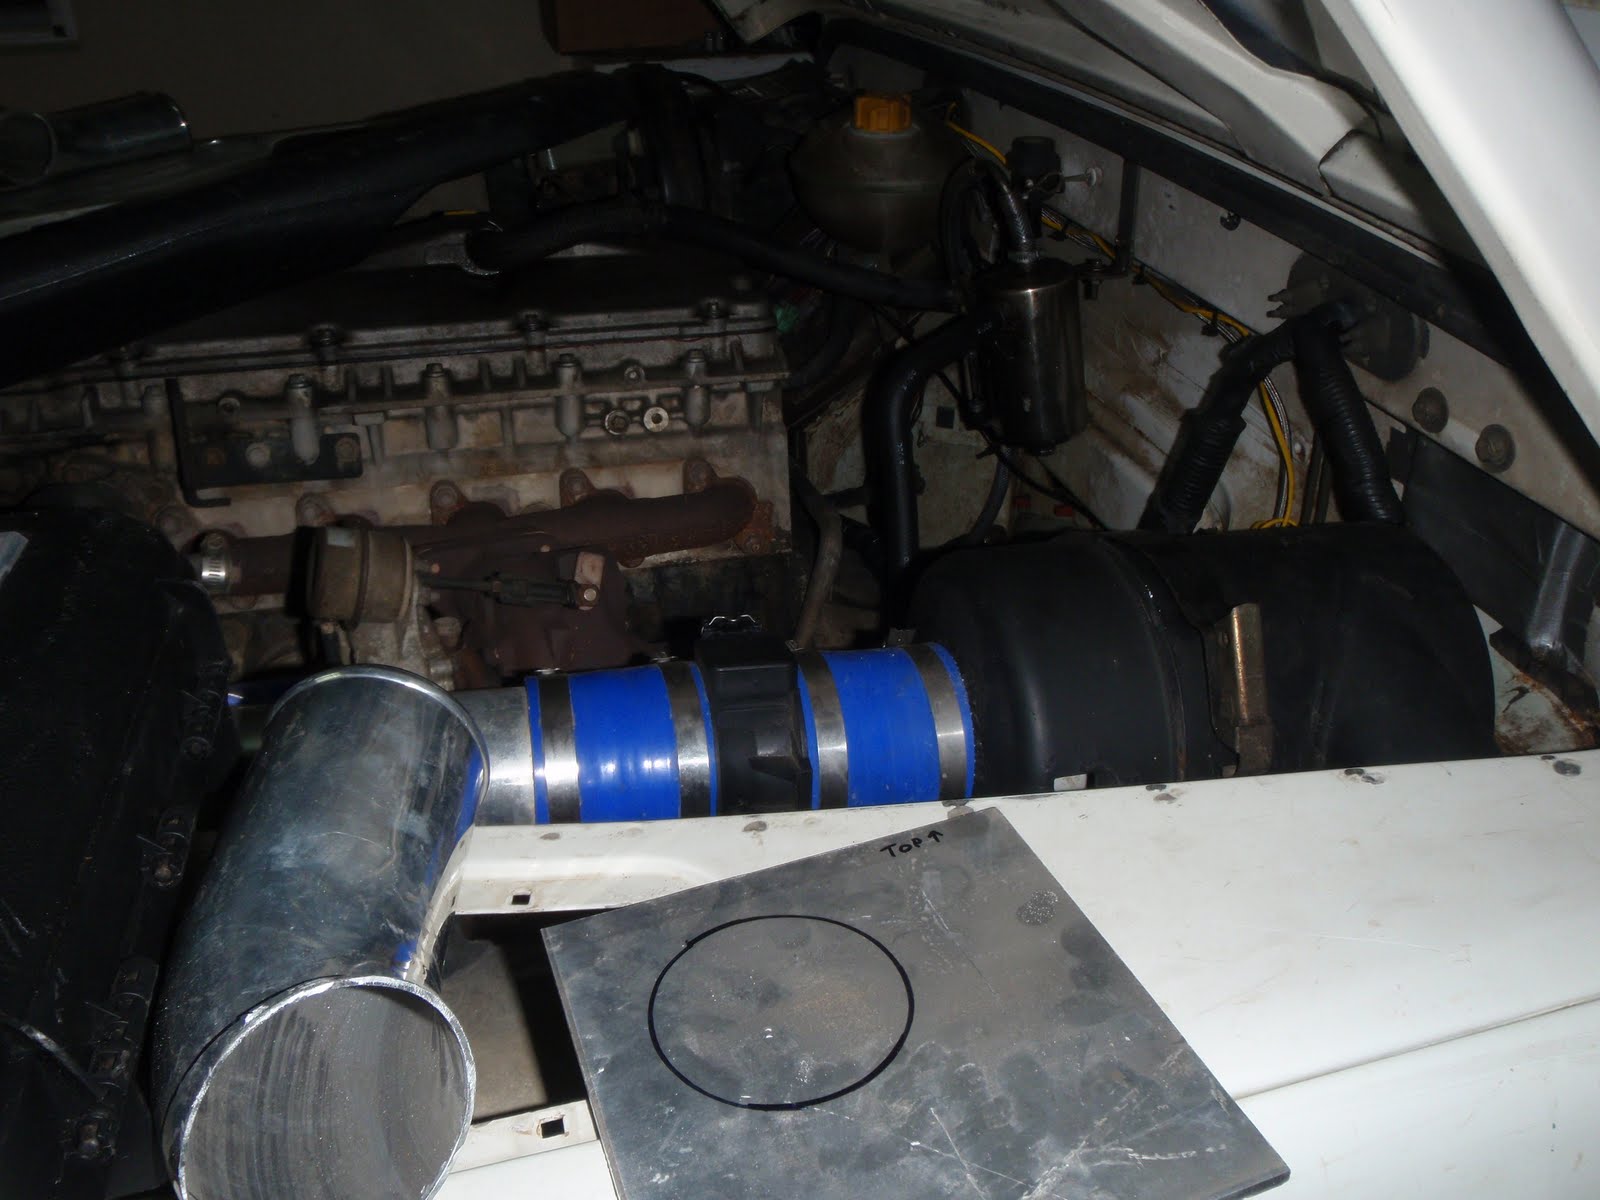
I've spent the last week and a half trying to fit my PAS cooler for the ram-assist. I purchased the unit from a scrapped discovery. The overall dimensions were not too bad for fitting purposes but a bit tighter than I would have liked.
after multiple trips to the hardware store/ hydraulic supply I decided on 2 x 1/2" NPT 90degree elbows (pictured above) and 2 x 3/8" barb male fittings on the cooler and 2 1/2" barb unions for the plumbing into my low pressure return. I got some cheap and cheerful 3/8" i.d hose (dont say it yet) that should've done the trick. Yada yada, all hooked up and everything looked tidy as fuck if I say so myself

 Time to test.
- everything tightened - Check
- fluid in the reservoir - Check
- key in ignition - Check
Td5's are notoriously hard to start if they've been sitting for a while, in this case a few weeks, I think it's to do with the fuel pump personally. So I had to do a bit of the old gasolene doping trick in the MAP sensor port. BAM! it lives again.
"Jesus..." I thought to myself, "that pump sounds loud, maybe I should turn the wheel to get some fluid going" so I turn the wheel and the noise subsides but then I get the almighty *WHAPAXX* "Holy Fuck!!, what was that?" then I notice that there's fluid everywhere on my walls. A quick shutdown ensues, "What in the hell??--" I then go to take a look in the engine bay and EVERYTHING is covered in power steering fluid. After a quick inspection I realised it was my budget hose that decided it had enough and was going on vacation in grand style. Updates to come soon, as I've just purchased the 300psi hose today

Thursday, July 7, 2011
Hydrauphobia
Well, here are some photos of a second hand hydro assist kit I obtained for the defender.


I'd describe the install, but there's already an excellently detailed writeup here by a guy under the forum name 'Robhybrid' who has saved me endless horrors because I'm clueless about the inner workings of a landrover PAS box and without him I'd never have figured out the circuit for the lines as everything was disassembled when I got it.


I'll have to do a bit of grinding to get the rose joint to fit in the steering rod but that's not too bad given the ease of the install itself. I've also, on the recommendation of many interweb forums, decided to integrate a PAS cooler which gets plumbed into the reservoir's low pressure return line (sitting on the bumper in the last photo) I got it from a scrapped auto discovery and it works a treat with the limited space I've got left as the intercooler takes up most of it.
I'm also trying to do some machinations to relocate the ram directly to the steering knuckle, but it is very tricky business with the standard defender suspension getting in the way.


C.V. Replacement
This space is dedicated to the c.v. joint install that I'm scheduled to do sometime this weekend.
I can't really say I'm looking forward to it, but I think I've achieved a reasonable level of confidence when it comes to front axle strip-downs.
Hang on.....I did I mention before that I broke a C.V joint, right??............


I can't really say I'm looking forward to it, but I think I've achieved a reasonable level of confidence when it comes to front axle strip-downs.
Hang on.....I did I mention before that I broke a C.V joint, right??............


Silicone hoses
Self-explanatory. I picked up a cheap set in the UK. Not much to say here really, wax off - wax on.


Monday, June 27, 2011
1.5 seconds of fame
Check out these highlights of the recently concluded SOL rally barbados 2011.
Sandy ver. 2.0 has also made the final cut into the opening scenes.
Monday, May 30, 2011
Digression

Check out this beast of a disco build I chanced to come across, surfing teh interwebs.
From what I can tell the guy's name is Norman Hall, and going on what I see here, he is legendary. (that's also his photo above)
Tuesday, May 3, 2011
Fun-day shakedown


Entered a competition for the first time yesterday, the landy looks the part, but it really isn't......yet.
So if any of you are reading this and happen to be;
a) a filthy rich benefactor
b) a trust fund baby
or
c) the owner and/or close friends with an owner/dealer of QT services or Equipe
I have no qualms in regard to whoring out my landrover with advertising in return for free part sponsorship from either company :)
Lifted!!

In an effort to get around the horrible rubbing noises that the boggers were making. I had to produce some sort of suspension lift. It had to be in a hurry as well, because I was due to enter an event on the monday and I was in a helluva rush. I had a mate that I was told was selling some +2" springs but I couldn't get a hold of him in time. So I managed to get my hands on some nylon blocks to cut some spring spacers. I had the blocks roughly shaped down at a friend's woodwork shop, and then tidied up courtesy of my new latheman (Bigup ya self Nick!).
Their install took a long time because I did it myself, but the task itself was fairly simple, the only tricky part was that 6mm mild steel plates had to be cut in order to mount the shock absorber base 2" higher on the front (to avoid unnecessary bottoming out) But given the timescale I was working with, the back had to be left as is, but I haven't heard any thumping as yet!


Everyone loves a freebie
It wasn't free exactly, I had to fabricate a few mounting brackets for an A/C compressor and a custom power window install on a truck. It also wasn't building any air pressure, so I thought the compressor piston rings were shot, but it turned out that it was only busted O-rings and a bit of a service.


Now if I could only I could make some more brackets for a "free" set of lockers :\


Now if I could only I could make some more brackets for a "free" set of lockers :\
Snorkel completion


 Here are a few shots of the adapter plate I had to fab up to complete the snorkel install. I was going to make a fancified one to convert the entire opening to fit the 3" dia intake, but, I didn't have the tools or the time so a 3" hole in some 1/4" plate had to suffice.
You'll also be able to get an idea of what the engine bay looks like when it's de-crappified.
Monday, April 18, 2011
Ze boggers have arrived!!
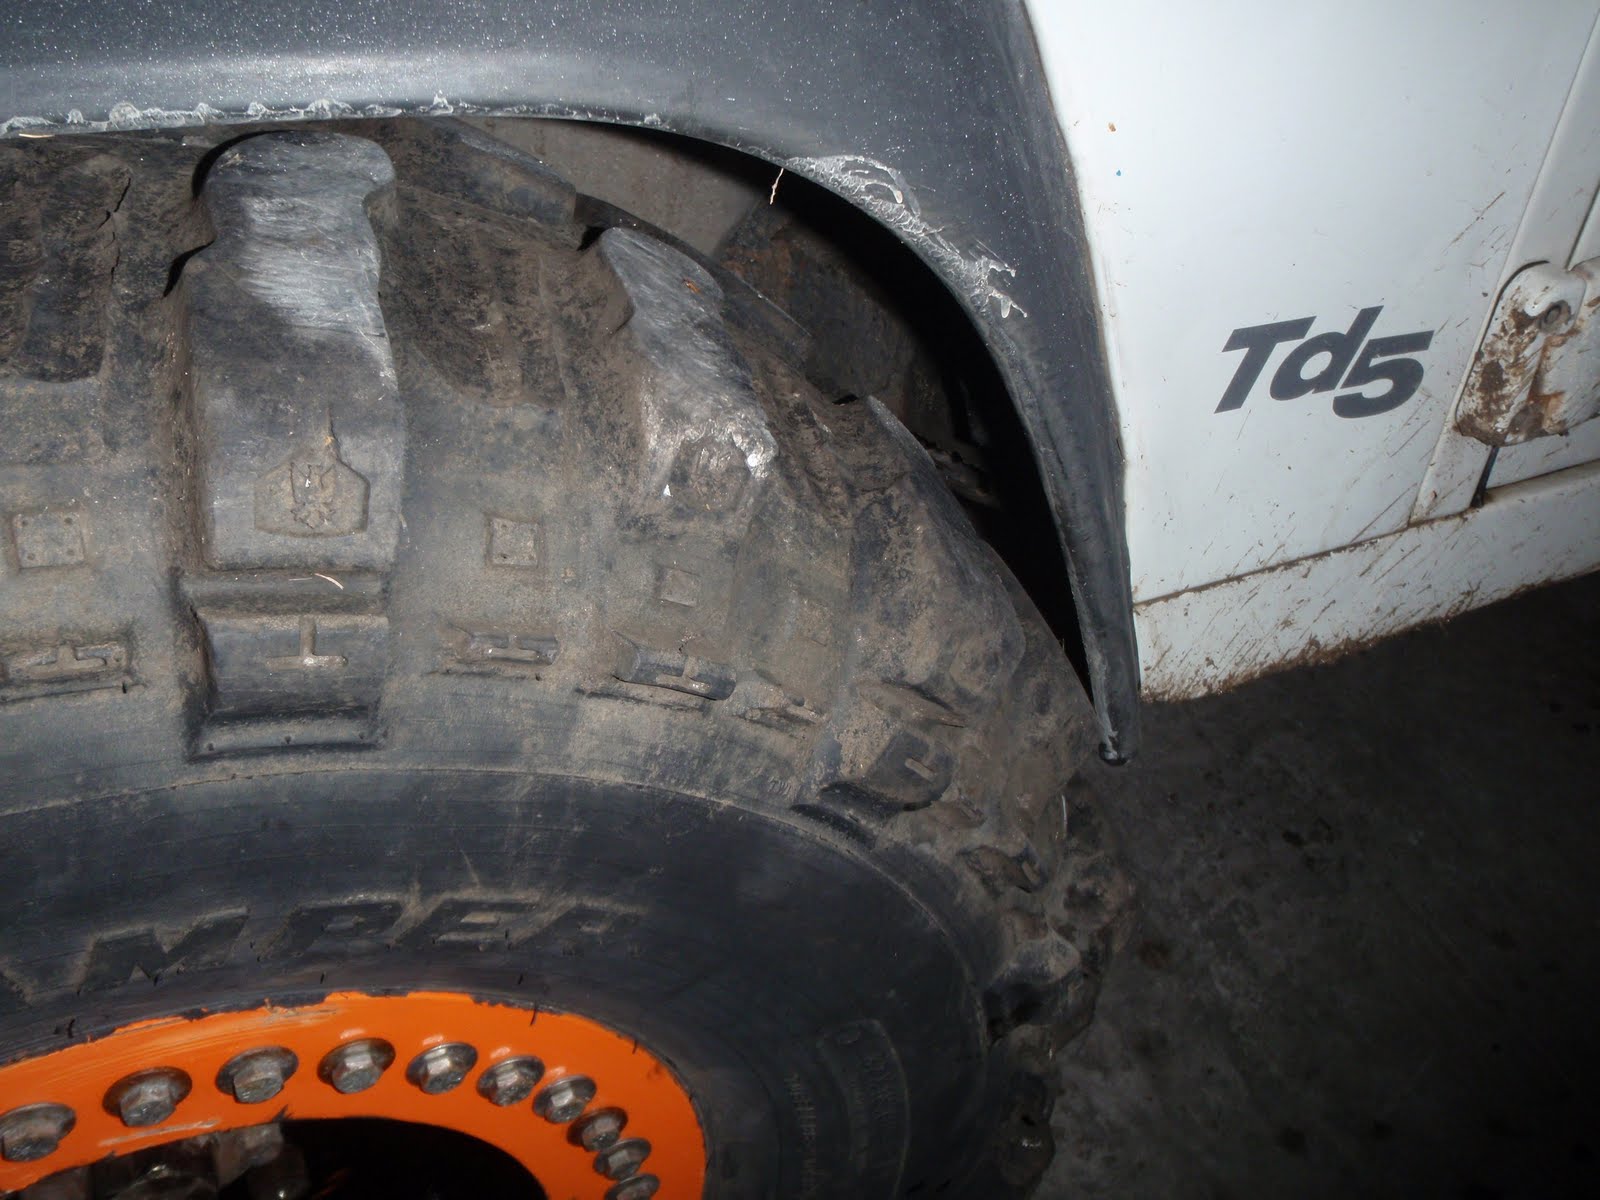


Ka-boom. I've bought a set of lightly used TSL boggers from a challenge built tomcat here, so I fitted them up to see if I had any clearance issues to contend with. As it turns out, they fit well with only fender issues, but that was to be expected as it's a 37" bogger (35" true height") and the suspension is still at standard height, for now.
Friday, April 15, 2011
NEW BRAAAaAAaKES!!!
CUE THE HANDEL!!
So I've touched on this item in a few earlier posts, but I dedicate this one entirely to their install
 I bought them a few months back from a reputable UK parts dealer, main reason being, that the driver's side calipers were seizing therefore when applying brakes it would tug to one side. I bought the rebuild kits for the front calipers and went to town on the job.
Suffice to say that when rebuilding calipers you must NEVER, EVER under any circumstances split the calipers to do the Job. Reason being that there is NO WAY to find a replacement seal that fits between the two halves. I've tried everything, the best way is to use a compressor and blow out the pistons one by one and replace the seals individually, refitting the pistons back into their homes is simple, just make sure you rub the new seals with some assembly lube so they don’t get pinched on refit and you’re golden.
The rotor replacement is all about brute force, I’ve become somewhat of a professional at hub disassembly given that I’ve done it about 5 or 6 times now (various bearing changes) the drive flange bolts have a tendency to break off on removal so you’ll need to be careful when removing them. Other than those things it’s a straight unbolt->bolt-on change.
Thursday, April 14, 2011
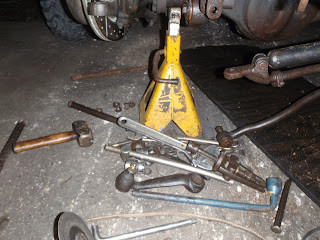
The Pitman arm debacle
Sandy Mk II had developed a bit of a "wobble" at 80km/h and that was doing nothing for my driving confidence.
I decided to have a look-see at the general steering/track rod area (as one tends to) to discover that the pitman arm ball joint was done for. After a $67 venture to the local parts supplier I dedicated a half a morning to the job and the rest of my day could then be dedicated to other issues, after all, how hard could it be? hmph, famous last words.
...job that can be carried out on a land rover, (and I have changed a salisbury once!!). Seriously, I take back everything I said about the bushing job being worse than childbirth (I suppose?) this made that look like a cakewalk.
The replacement of the ball joint itself is not so bad, provided you never ever(!!) run your finger around the inside of a freshly pressed race because you see something like a hair on the inside. That part will take about 20 minutes, the problem occurs when you realise that the entire pitman arm has to be removed to achieve this, and according to the bard, therein lies the rub.
the arm is retained on the steering box's splined shaft by a large nut and a locking tab washer. Bam! 5 minutes= nut removed. getting the arm off the splined shaft takes nothing short of a miracle. It can't be heated, (lest you destroy all of the steering box seals which to be honest, probably leak anyway if your landy is more than 3 months old) it can't be prised off of the shaft for the same reason as heating, and it can't be beaten off from under the bonnet with a really long bar as some forums suggest (that may be subject to the model that you have, but on a non-a/c RHD landy, the answer is no)
Needless to say I spent the ENTIRE day beating, cursing, hammering, cursing again, shaking and shouting at the arm, until I decided I'd had enough and took a grinder with a very thin cutting blade to it.
N.B- I do not recommend this method nor do I accept any liability should this be the route that you choose to employ.
so after some very careful cutting and a great deal of patience this was the end result, and much to the pleasure of my ego, not even a scuff on the splines. well chuffed!


 (see my nice brakes?)
Reassembly was essentially the reverse of the above, but including copious amounts of anti-seize on all nuts and splines.
Next time, I'll pay a garage!
I decided to have a look-see at the general steering/track rod area (as one tends to) to discover that the pitman arm ball joint was done for. After a $67 venture to the local parts supplier I dedicated a half a morning to the job and the rest of my day could then be dedicated to other issues, after all, how hard could it be? hmph, famous last words.
That "simple job" has proven, unequivocally, to be the worst, and I mean WORST
-~*^@#$~-> W-O-R-S-T <--~$#@^*~-
-~*^@#$~-> W-O-R-S-T <--~$#@^*~-
...job that can be carried out on a land rover, (and I have changed a salisbury once!!). Seriously, I take back everything I said about the bushing job being worse than childbirth (I suppose?) this made that look like a cakewalk.
The replacement of the ball joint itself is not so bad, provided you never ever(!!) run your finger around the inside of a freshly pressed race because you see something like a hair on the inside. That part will take about 20 minutes, the problem occurs when you realise that the entire pitman arm has to be removed to achieve this, and according to the bard, therein lies the rub.
the arm is retained on the steering box's splined shaft by a large nut and a locking tab washer. Bam! 5 minutes= nut removed. getting the arm off the splined shaft takes nothing short of a miracle. It can't be heated, (lest you destroy all of the steering box seals which to be honest, probably leak anyway if your landy is more than 3 months old) it can't be prised off of the shaft for the same reason as heating, and it can't be beaten off from under the bonnet with a really long bar as some forums suggest (that may be subject to the model that you have, but on a non-a/c RHD landy, the answer is no)
Needless to say I spent the ENTIRE day beating, cursing, hammering, cursing again, shaking and shouting at the arm, until I decided I'd had enough and took a grinder with a very thin cutting blade to it.
N.B- I do not recommend this method nor do I accept any liability should this be the route that you choose to employ.
so after some very careful cutting and a great deal of patience this was the end result, and much to the pleasure of my ego, not even a scuff on the splines. well chuffed!


 (see my nice brakes?)
Reassembly was essentially the reverse of the above, but including copious amounts of anti-seize on all nuts and splines.
Next time, I'll pay a garage!
Breather line extension "kit"
 Lol, not so much a kit as it's much more like what $60 in supplies from a local DIY wil get you.
The install was fairly easy, I've qualified the "easy" here because the gearbox and trans case breathers can be a right pain-in-the-ass to get at but nothing a bit of determination and some WD-40 can't solve.
The TD5 axle breathers are not threaded, but the push to fit type lines. So I pulled the plugs out with a vise-grip and tapped a new 1/4" NPT to receive the compressor lines that you see above. here's the plug before I pulled it out
 The Gearbox carries a torx plug and if your defender is "well-travelled" like mine then after you strip this trying to get it out, it may be a good idea to replace it with a common diff/plumbing plug. After joining everything together I've just run the main hose up the snorkel and Voila! Job done!
Monday, February 21, 2011
Half of a bushing install


I'd finally had enough of seeing the urethane bushings I had purchased last year sitting over in a corner and decided to put them in. I had figured out in my mind that I would dedicate 1 day to the task and that would be sufficient. Now, I'll never know what childbirth feels like, but, I assume it's similar to removing radius arm bushing bolts on a landrover after the vehicle's been driven for months without a service.

 Not an impossible job for one man, but time consuming, hence why I took a weekend to only get the front done. It'd be better if friends were lured in on the premise of free beer.
I give it a 7/10 for difficulty
Subscribe to:
Comments (Atom)